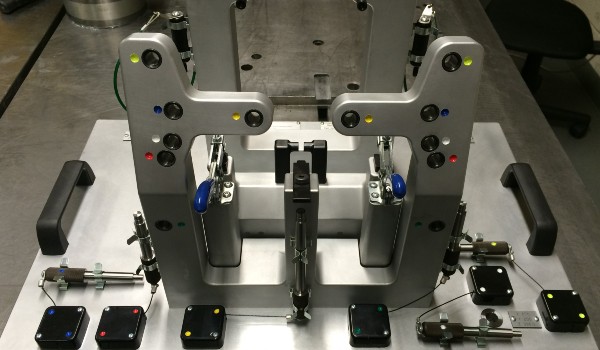
As part of our buyer’s guide series, the team recently sat me down to ask questions that we hear a lot from our fixture customers. We recorded it on video and have created this summary with the aim of providing time-and-money-saving advice to those in the manufacturing industry. This is the second video in our series — click here to check out the first.
In this clip, I’ll be talking all about:
-
Where to start with a customer
-
Whether a checking fixture is produced before production starts
-
If a checking fixture can be created post production start
-
Whether one way is easier than the other
Watch the video or read the summary below to learn more.
Where do you start with a customer?
Usually, the customer will approach us with a CAD drawing of a component that they are quoting to manufacture. This could be the tooling for the component they will manufacture at another tool makers.
You can find out more about how much a checking fixture costs by reading our blog.
Then they’re going to manufacture the components on site, requiring a checking fixture to check the components.
We’ll have the CAD data from them and any information that they can give, such as how they want to check it, and we’ll design it from scratch.
Is a checking fixture produced before production starts?
It usually runs alongside the tooling for the components — we'll typically create a fixture around three or four weeks into the tooling stage.
Can you create a checking fixture post production start?
In short, yes. There are some projects for which customers don't initially believe they need a checking fixture, but, when they’ve got the components in production, they realise that it’s necessary to have one.
Is one way easier than the other?
Not really, no, but it is helpful if we’ve got a component so we can try it on the checking fixture. But, ultimately, it’s not necessary.
The CAD is the main thing — even if we have the component, there’s usually CAD drawings.
The alternative is reverse engineering, where we scan a component and produce the CAD drawings from that.
For example, if it’s a simple check, we can cut a block to a form, drop it down, and have a test gauge go around to check that the form is correct — dimensions, pins, and so on.
If the customer requires the fixture to be used on a CMM, we’ll need to incorporate datums as reference points on the base plate, which is usually through dimensional bushing.
These are usually 3 or 4 datum bushes in total, which are hardened, ground and positioned on the fixture base to give the coordinates of X Y & Z from the component CAD Data.
This allows the CMM operator to set the machine from known datums prior to inspection of the component.
If you found this content useful, why not read our checking fixtures buyer’s guide? It contains practical advice for getting the best value out of your checking fixture.
And if you’d like to discuss a project with us, we’d love to hear from you. Let us know you'd like to talk by requesting a call back.
For more content like this, follow us on LinkedIn by clicking the button below.


